How to Use Bins in Premiere Pro
Learning how to use bins while editing recipe videos in Adobe Premiere Pro will help you develop an organized workflow that saves you time and effort. Watch the video below to learn how to properly set up bins and why you want to use them, or keep scrolling to read more about this.
How to create organized video editing projects
I love creating organized projects in Premiere Pro and using bins is crucial. It helps keep everything neat and tidy so you can find it, use it, and get on with your life.
As food bloggers we have a lot on our plates, a lot of different tasks to learn and do, and video editing is just one of them. I want to help make it as quick and painless as possible for you.
How to set up bins in Adobe Premiere Pro
Find the project panel
The first thing we want to do when we get into Premiere Pro is look for the Project Panel on the bottom left. If you’re not seeing it, you want to look towards the top and make sure you’re in Editing view, not one of the others like Color or Effects.
You can also find the Project Panel within those views, but for our purposes we’re going to stick to Editing. If you’re still not seeing it, check to make sure you haven’t clicked on one of the other tabs in that window, in which case you can look for the double carrot and select your project.
Another thing I like to do is press SHIFT + 1 on the keyboard and it jumps right there.
How to create new bins
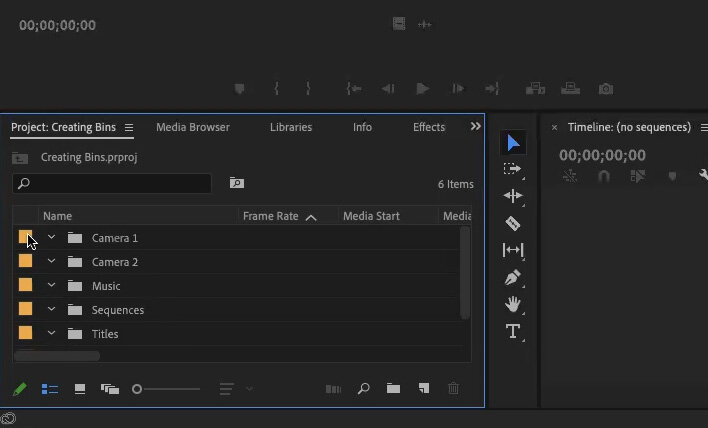
We are going to create what’s called Bins for every different type of thing we’re going to work with in our project. Look for the little file folder that says New Bin. For this particular project I’m going to pretend we have footage from two different cameras, so I’m going to create one bin for Camera One, and another new bin for Camera Two.
We’ll also do Music, Voice Over, Sequences, and Titles.
How to un-nest bins
You can see as we created those they all kind of nested into each other. We don’t want to do that, we want them each to be their own parent category. We can just grab the file folder and drag it toward the color to make each their own parent category.
How to color code bins
I’m also going to color code them by right clicking on the one I want to change and choosing Label, then selecting the color that I want. Repeat this with each bin so each one has a different color.
How to import footage into bins
Now we want to import some footage into these bins so I will single click on the bin I want to import into, then choose File -> Import (or COMMAND + I) on the keyboard) and select your footage.
How to make footage color match bin color
You can see all the footage in the Camera One and Camera Two bin have the same color. We can go ahead and SHIFT + CLICK to highlight all the footage in one of the bins, then CONTROL + CLICK and change the label color to match the bin.
Once you have a sequence with some footage in it, you can see why it’s helpful to color code different types of footage. Some of my footage needs to be rotated. If I edit a long video utilizing both types of footage, I can go through and create a rough cut, then come back and easily see which footage needs to be rotated without needing to scrub through my footage.
That’s it! Let me know if you have any questions, or join our Food Video, Photography, and Editing Facebook group to meet up with other professionals like yourself!


