How to Use Slip, Slide, and Rate Stretch
Slip, Slide, and Rate Stretch are three tools you should know how to use in Adobe Premiere Pro. Watch the video below or keep reading to learn how.
If you’ve never heard of Slip, Slide, or Rate Stretch, don’t worry, I’m going to explain everything you need to know. They are really useful, especially Rate Stretch which I use all the time in editing recipe videos.
Slip

The first tool we’re going to cover is Slip. I love quick keys, and you can go back to my post on how to use quick keys to edit recipe videos, but to get into the slip tool we’re going to press “Y”.
Otherwise, you can find Slip by going to the mini menu to the left of your sequence. If you don’t see it, hold down your mouse to look for it.
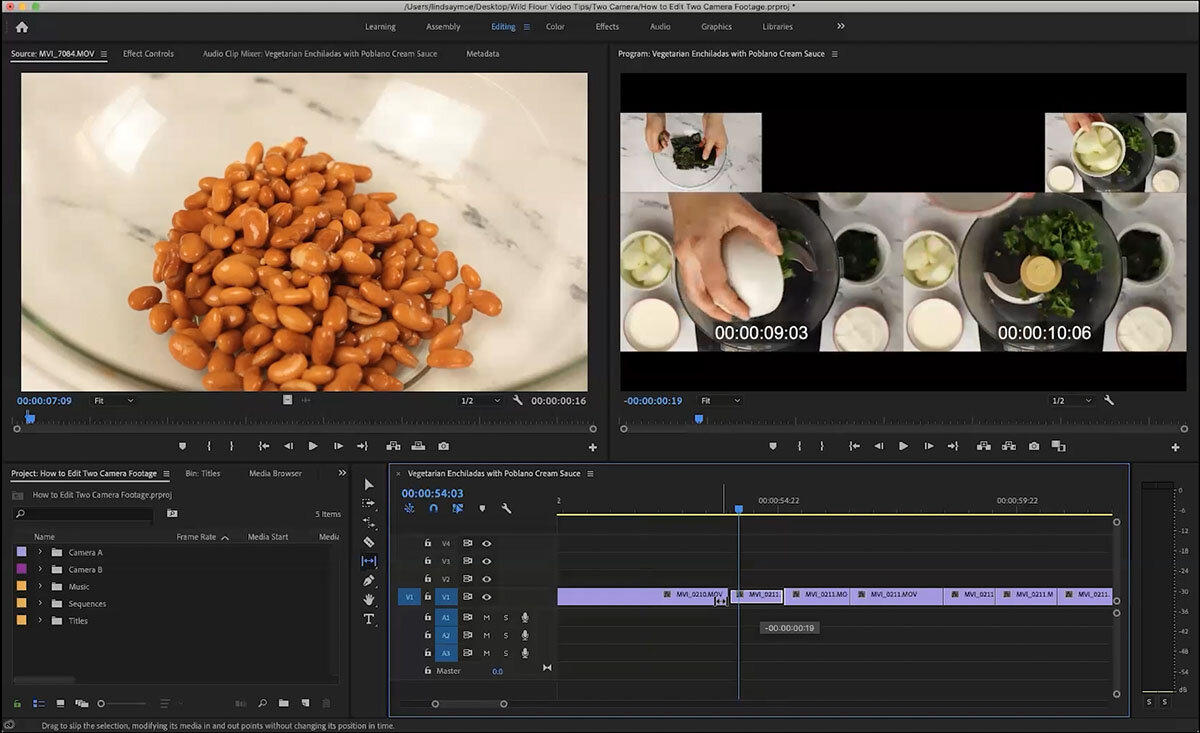
Slip allows you to adjust the portion of the clip you selected. You can slip it to the left or right to adjust the in and out point without changing the length of the clip or sequence. It also will not affect the clips around it.
You can see if I grab this clip and move it to the left, the program monitor is now showing me my new in and out points, as well as the clips on either side of it.
Slide

We can get into the slide tool by using the quick key “U”. You can also find it in the same mini menu to the left of your sequence.
This tool I don’t often use because it simply moves the selected clip to the left or right in the timeline.

Slide affects the clips immediately to the left and right of the selected clip by overwriting one and extending the other. It does not affect the overall length of your sequence. I don’t find a lot of use for this in recipe videos, but it’s good to know the option is there if you need it.
Rate Stretch

Rate stretch is a tool that I use all the time. You can get into it by pressing quick key “R” or find it in the same mini menu.
This tool gives you little handles on the ends of your clips. If you grab one of these handles you can compress your footage without changing your in or out point.

The clip gets compressed by changing the speed of the footage. I don’t recommend going under 100% unless you shot your footage at 60fps, otherwise it will look choppy.
This is especially great if you’re trying to keep your recipe videos under 60 seconds. You probably have a lot of steps you’re trying to show, and if you don’t feel like you can cut anything else out of the video rate stretch will help you squeeze it in.
I hope you’ll try these tools, they’re a little more advanced and can help create a more polished video.
Let me know if you have any questions, or head over to the Facebook Group to start a conversation there!
