How to Create Closed Caption Files
If you’re creating videos to share on your blog, it’s important to be creating closed caption files to go along with them to keep your site accessible as well as ADA compliant. There are three easy ways to create closed captions. Watch the video below or keep reading to learn how.

I know the list of things you need to do can feel a million miles long, but accessibility is not something you can overlook. If you’re creating recipe videos that you’re putting on your blog you need to be creating closed caption files to go along with those videos.
I’m going to show you three ways you can do this easily. One is in Premiere Pro, one is in YouTube, and the other is just a text file.
It’s really not going to be that hard to incorporate this into your workflow going forward and if, like me, you have a lot of videos to go back and add a lot of captions to, it’s not going to be as big of a project as you might think.
How to create closed captions in Premiere Pro
The first way to create closed captions is great if you’re already creating videos in Adobe Premiere Pro. Here I have a recipe for Fettuccine Alfredo that I have already finished editing a video for. After exporting this video, I’m going to come back and create the closed caption file.
How to create a new closed caption file
To do that I can either go to File —> New —> Captions, or click on the New Item icon in the Project Panel and select Captions.

We want to make sure we select Open Captions, that our frame rate matches what we shot our video in, and that the video settings are the same as the sequence we’re going to be using. Click Ok.

How to open the Captions Panel
Down in the Project Panel, click on the new captions you created and it will open up the Captions Panel.
How to edit your closed captions
Click to change the text within the caption box. With this video being set to music, I like to use {upbeat music plays throughout} and set it to 20 seconds.

You may feel more comfortable setting the duration of your captions to match the length of your video, or I recommend consulting a lawyer to make sure you’re meeting ADA requirements.
I personally feel that by leaving the captions up for 20 seconds and using the word “throughout”, it is clear that the music plays the entire time.
If you are creating captions for a video with spoken word or other sounds, you will want to include everything in your captions that would otherwise be heard in the video.
You can add more captions at different timestamps by clicking the “+” icon at the bottom of the captions window, or remove them by clicking the “-“.
If I highlight the text in my caption I can then change the font, size, and position.
How to add closed captions to your video sequence
Head back to the Project Panel and drag your caption into your timeline on it’s own video layer. It should be showing in the Program Monitor and be set for the amount of time you indicated.
What to do if you don’t see your closed captions
If you don’t see your captions, click on the wrench icon within the Program Monitor to open your settings, go to Closed Captions Display, and make sure Enable is checked.
How to export the closed caption file
To export your captions, click on it in the Project Panel, then go to File —> Export —> Captions. We’re going to create what’s called a SideCar File in SRT format. Click Ok, give your file a name, and select where to save it.

How to create closed captions in YouTube
The second way to create captions is if you’re working in YouTube. This is useful if you already have your videos uploaded to YouTube. Alternatively, you could upload a video solely for the purpose of creating a closed caption file.
If you don’t want the video to appear on your channel, just choose Private when uploading your video.
How to create new closed captions
Click on your profile picture in the upper right and select YouTube Studio.
On the left side menu choose Videos where you’ll be brought to a list of the videos you have uploaded to YouTube.
Once you’ve chosen a video, look to the right of the thumbnail image and click on Details. In the left side menu choose Subtitles. Here is where you can create subtitles.

Choose the language of your video and click Confirm. Under Subtitles click Add, then choose Create New Subtitles or CC.

Similar to Premiere, here is where we can add the text we want to show in our subtitles. Click the “+” button to add it to your video, and you can change the duration of the caption by clicking on the timestamp.

Once you have all your captions in place, click the Publish button.
How to download the closed caption file
Click on the subtitles you’ve created (in this case it is labeled “English”), which will bring us back to a similar window. Here is where we can click on Actions and choose what type of file we would like to download.

How to create a closed caption file from a text file
The final option for creating a closed caption file is useful if you already have an existing closed caption file. In this case I have a file folder full of VTT files.
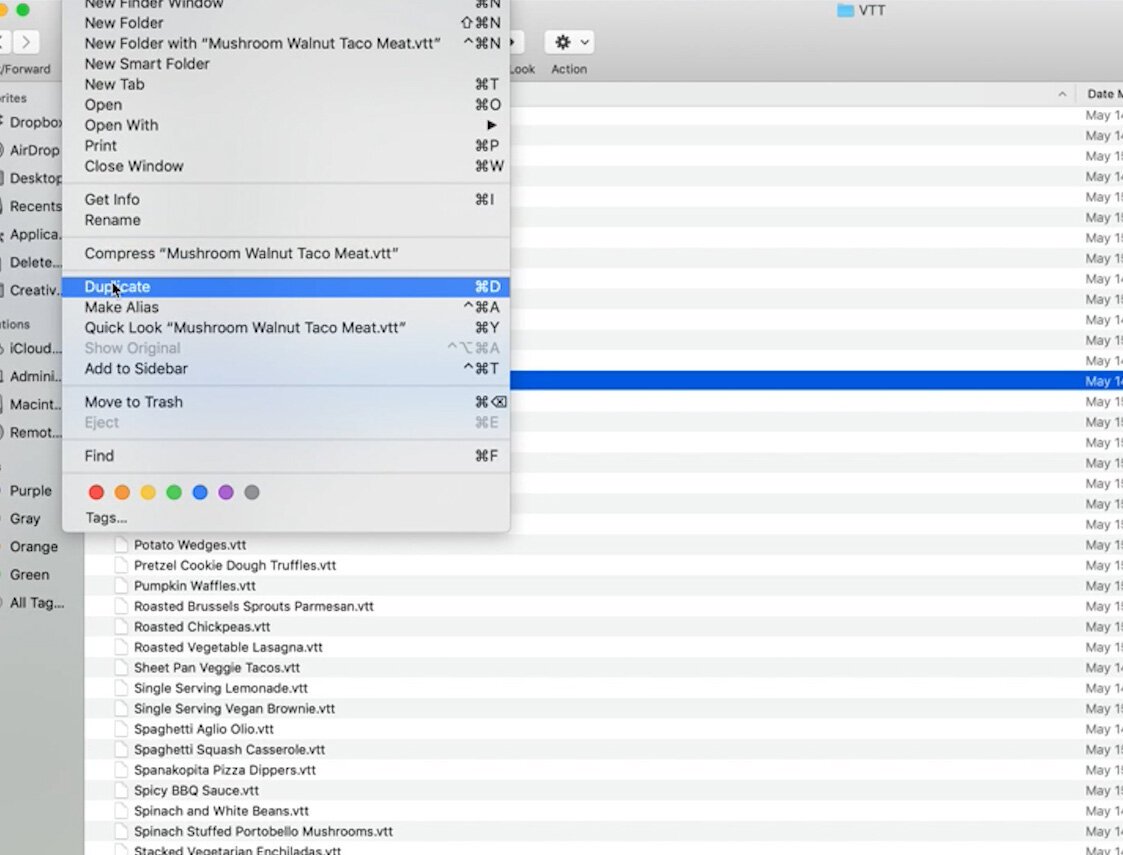
What I can do is click on one and go to File —> Duplicate. Rename it to match the video you’re creating it for and be sure to delete everything beyond the file extension (the word ‘copy’).

You can now use this as you would any other closed caption file by uploading it to your ad network, etc.
If you wanted to change anything about the file you can adjust the length or captions themselves by opening this file inside a text editor.

I hope you found this tutorial helpful. It’s really not that hard to create closed caption files for your recipe videos and it only takes a few extra minutes to make your videos more accessible.
Let me know if you have any questions, or head over to the Facebook Group to start a conversation there!