How to Use Lumetri Scopes and Curves in Premiere Pro
Learn how to use lumetri scopes and curves to color correct your footage in Adobe Premiere Pro and get perfect white balance every time! Watch the video below or keep reading to learn how.

If you’re feeling intimidated by using the lumetri scopes and curves inside Adobe Premiere Pro, don’t worry, I’m going to walk you all the way through it and it’s much easier than you might think.
I don’t recommend relying on just your eyes when color correcting your footage. Either your screen may not be calibrated correctly, or the light in the room where you edit can really affect the way you see colors.
You’d hate to publish a video and then come back to it later and realize you got it completely wrong (definitely speaking from experience here!).
The scopes really take the guesswork out of your color correction and I’m excited to show you how to do it.
How to use Lumetri Scopes in Premiere Pro
I’m working on a video for a mug cake and I have a shot of icing being drizzled onto the cake. I want to make sure my exposure and white balance are just right.
How to find Lumetri Scopes
To fix my exposure I’m going to click on the clip and head over to the Color Panel. If you don’t see your Lumetri Scopes, go to Window —> Lumetri Scopes to bring it up.
In the bottom of the Lumetri Scopes panel, click on the wrench icon and choose Waveform (Luma). If there are other scopes open you can click on them in the same menu to close them so you can see more easily.
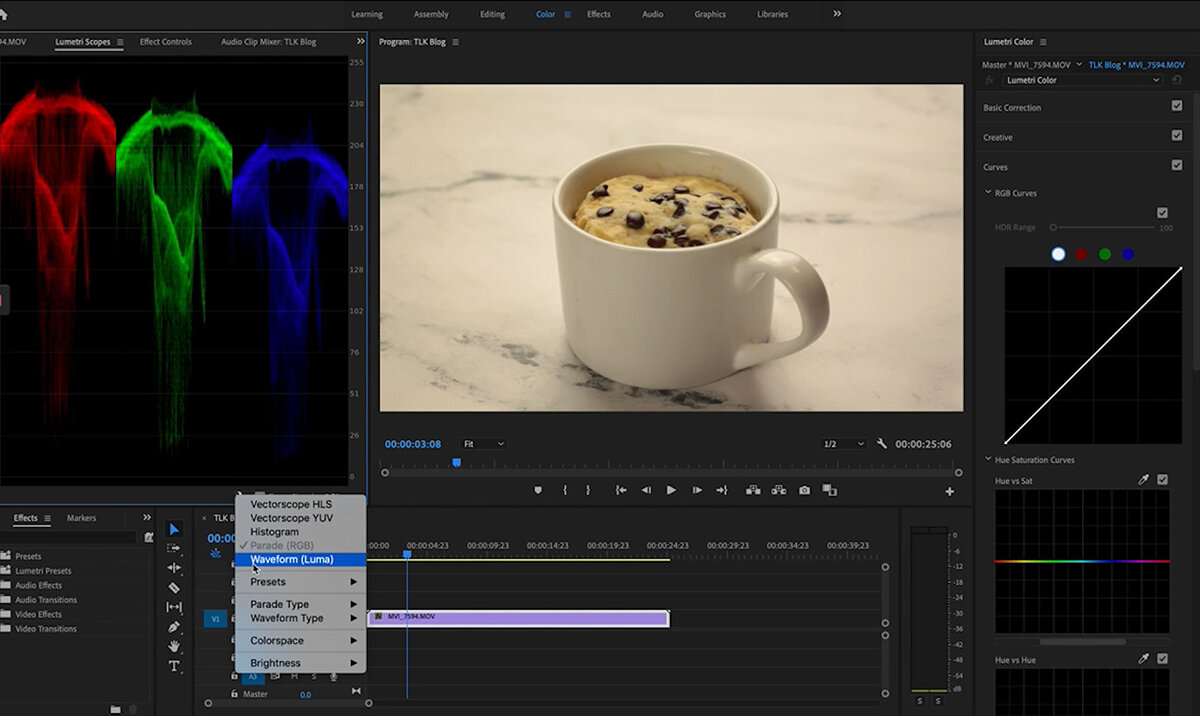
How to read the Waveform (Luma)
Here in the Waveform (Luma), 100 represents our whitest whites and 0 represents our blackest blacks. Anything going beyond those two values would result in a loss of detail.
Curves in Premiere Pro
This video has a lot of white in it, but it’s not quite reaching either extreme in the whites or blacks. To fix this, head over to the Lumetri Color Panel and open up Curves.
I’m going to start in the white curves, so make sure you’ve selected the white circle. Now, click on the dot in the upper right hand corner and drag it across to the left until our Lumetri Scopes show closer to 100.
I’m going to do the same thing in the bottom left hand corner by dragging it to the right until we get closer to 0.

How to adjust white balance with curves in Premiere Pro
We’re obviously having some white balance issues here, so I’m going to go back over to my Lumetri Scopes to open up Parade (RGB) and close the Waveform (Luma).
If this looks intimidating, don’t worry. It’s simply representing the balance of colors within the highlights, midtones, and shadows. In order to create white balance, we want to BALANCE out these colors so they mostly match in their positioning.
To do this, head back to the curves inside the Lumetri Color panel. I’m going to start with the red, so I’ve clicked on the red circle.

Again, I’m going to grab the dot in the upper corner and drag it down so the red in the scopes comes down to where the green sits. I’ll also bring the blacks of the red curve down a bit.


Now we’ll go into the blue curves and bring the whites up. Already that looks much better! You could get much more granular by adding more points and adjusting the midtones of the curves if needed, but I’m pretty happy with how this one is looking.

Don’t be afraid to rely on your eyes a bit at this point, especially if you have hands or other skin tones appearing in the video. You’ll want to make sure that the colors still look natural and you haven’t over-adjusted anything into distortion.
How to use Vectorscope YUV to keep your colors broadcast safe
One last thing to check is under Vectorscope YUV (found under the wrench icon menu in the Lumetri Scopes window). The Vectorscopes YUV represents the dispersion of colors in our video. The inner white line is the broadcast safe area, so just make sure your colors lie within that line.
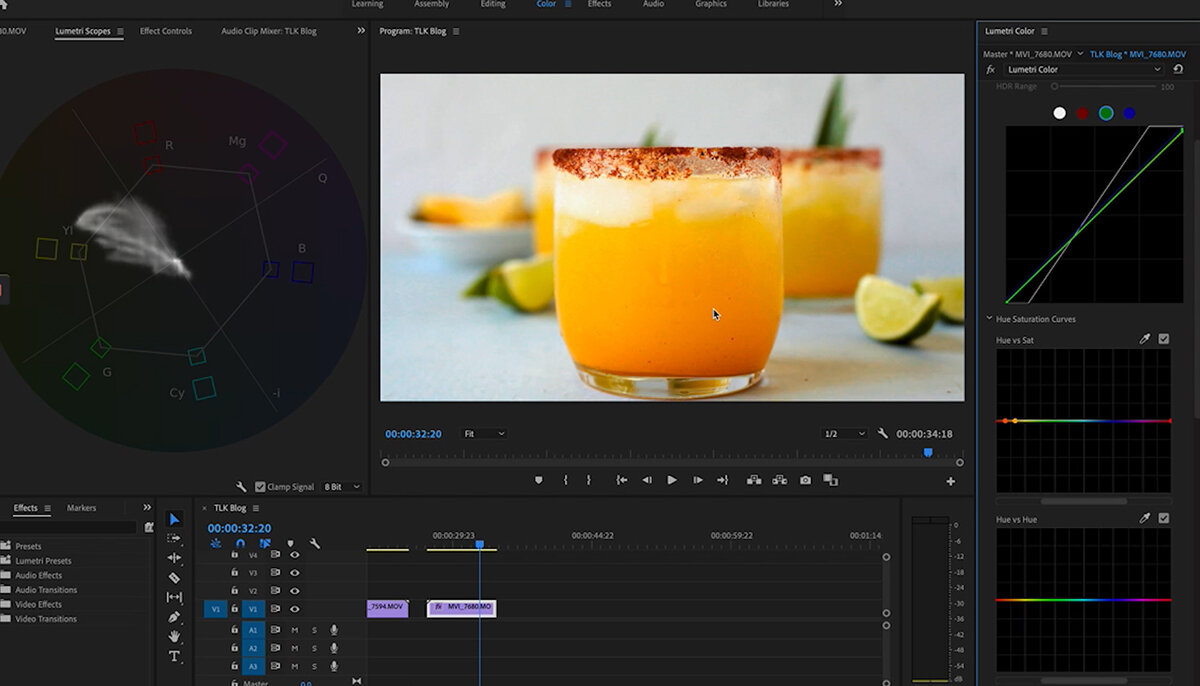
If you need to adjust the colors to come within the broadcast safe line, head down below your curves to Hue vs Sat and use the eyedropper tool to grab the color you want to adjust in your video.
Three dots will appear in the graph, which you can then drag down to bring them within the safe area. You can also add more dots to the graph simply by clicking on the line in order to make finer adjustments.

If your video starts to look a little flat after adjusting the hue, you can go back up to the Lumetri Color Basic Corrections to bring up the contrast or pull down the blacks.

Are you ready to jump into Lumetri Scopes and Curves? Hopefully you’re feeling a little more confident with these tools.
Let me know if you have any questions, or head over to the Facebook Group to start a conversation there!
