How to Create Light and Airy Recipe Videos
Learn how to create light and airy recipe videos in minutes using a simple adjustment in Adobe Premiere Pro. Watch the video below or keep reading to learn how.

Light and airy food photography might not be everyone’s style, but when it comes to recipe videos it really helps the viewer see what’s going on.
The technique I’m going to show you is incredibly easy to accomplish. All you need is a well lit video to start with and Adobe Premiere Pro for editing. If you don’t have Premiere I’m sure you could recreate this in a similar way using a different high end editing software, but I highly recommend Premiere for editing because it can do pretty much anything.
If you need help getting started, be sure to check out my posts on how to edit recipe videos in Premiere Pro as well as how I set up my lights for recipe videos and the equipment I use to make recipe videos.
How to create light & airy recipe videos
Using LUTs in your videos
The technique I’m going to show you today uses a LUT. It’s not super important that you understand what LUTs are in order to be able to do this, but it stands for Look Up Table. If you’re familiar with presets in Lightroom, it’s kind of like that for a video. LUTs adjust the color in your video to a preset amount while still allowing you to make the full range of changes that you normally would.
The thing about LUTs is they generally don’t look great right out of the box, they take a little finesse to get looking just right. One thing to be aware of is that by using this LUT on my footage I’m attempting to replicate shooting in a LOG format.
Not all cameras shoot in LOG, and, again, it’s not super important that you understand what that means in order to be able to do this. Just be aware that if you do understand LOG and your camera is capable of shooting in LOG format, this process would be unnecessary.
Its worth knowing that I’m using Adobe Premiere Pro 2022 in this tutorial. If you are using an older or newer version, it’s possible that this LUT isn’t available any more. A quick Google search should give you plenty of free and paid LUTs to play around with to try get the same effect.
Start with a rough cut
I’m working on a video for pumpkin pizza. I already have my rough cut done with my main footage on V1 and my second camera angle on V3. I like to color correct these separately because they come from different cameras and the light hits them differently.
Create an adjustment layer
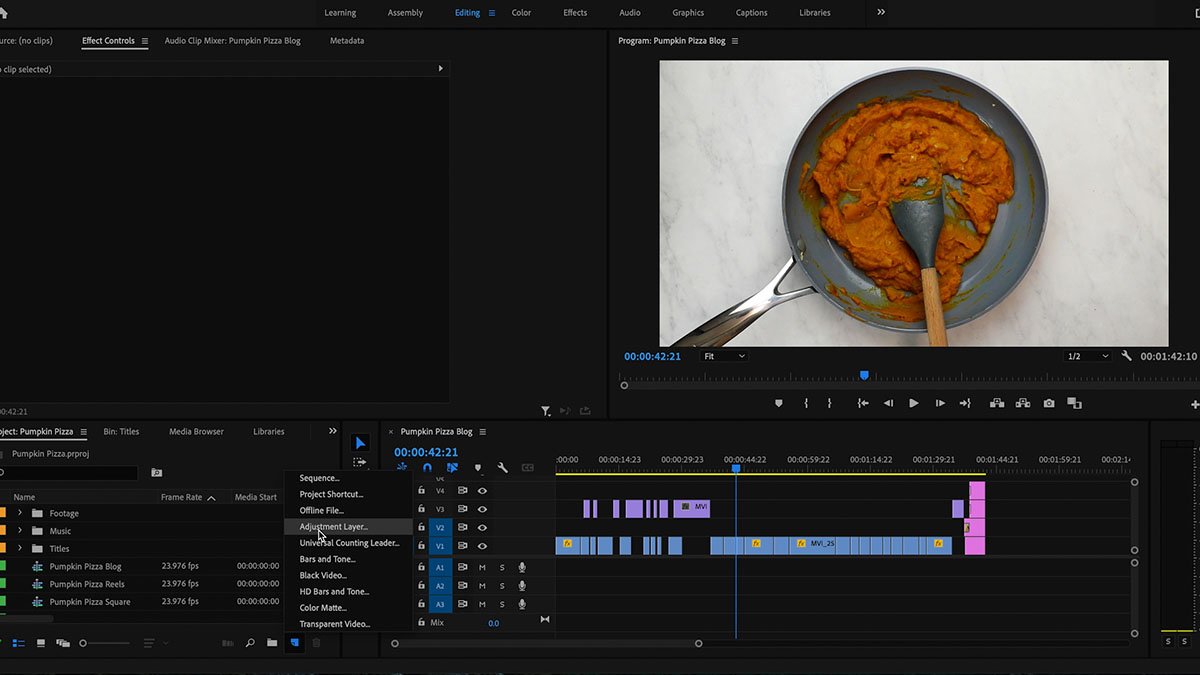
I’m going to start by creating a new adjustment layer and dragging that over onto V2. Be sure to extend it out to cover all the clips you want to include. Click on the adjustment layer to make sure that’s what you’ll be working with and go into the color panel.
Input LUT

Under “Basic Correction”, select the Input LUT “Phantom_Rec709_Gamma”. It’s not great on it’s own, so we’ll need to make a few adjustments. I like to bring the blacks and shadows down to about -80 and increase the contrast to 15. If needed, lower the highlights and whites and increase the exposure.

Check the white balance
At this point it’s a good idea to check your white balance. Open up your lumetri scopes and select RGB Parade. You can use the eyedropper tool and sliders under the white balance section to adjust this. Be sure to check out my tutorial on how to color correct and how to use lumetri scopes if this is new to you.
Adjust colors
You can see that this LUT washes out my skin tone and turns the orange a little more toward the yellow/green side. To fix this we have two options. We could go into the HSL Secondary menu, use the eyedropper tool to grab the orange, and adjust from there.

I prefer to go into the curves and adjust Hue vs Hue. Use that eyedropper to grab the orange color or whatever you want to change in the video and pull up the middle dot slightly. You can click to add more dots along the line and adjust a wider range of colors.

Be sure to check a few places in the video to make sure you haven’t adjusted more than you think. If there are individual clips that have gotten blown out or you aren’t happy with the color correction, click on the actual clip instead of on the adjustment layer and make your adjustments directly to the clip.
I hope you’ll try making some light and airy recipe videos. Let me know if you have any questions, or head over to the Facebook Group to start a conversation and share your work there.
