How to Use Motion Effects in Premiere Pro
Learn how and why to use motion effects in recipe videos in Adobe Premiere Pro. Watch the video below or keep reading to learn how.

If you’re not already using motion effects in your recipe videos I’m excited for you to try it out because there’s so many ways you can use them.
We’re just going to scratch the surface on motion effects today, but if you’re interested in learning more be sure to leave a comment over in the Facebook Group so I can create a more advanced tutorial.
Motion effects in Adobe Premiere Pro
Motion effects in Premiere Pro are things like scale, rotation, and position of your clips. There are a lot of different ways we can use them, so let’s get started.
Scale
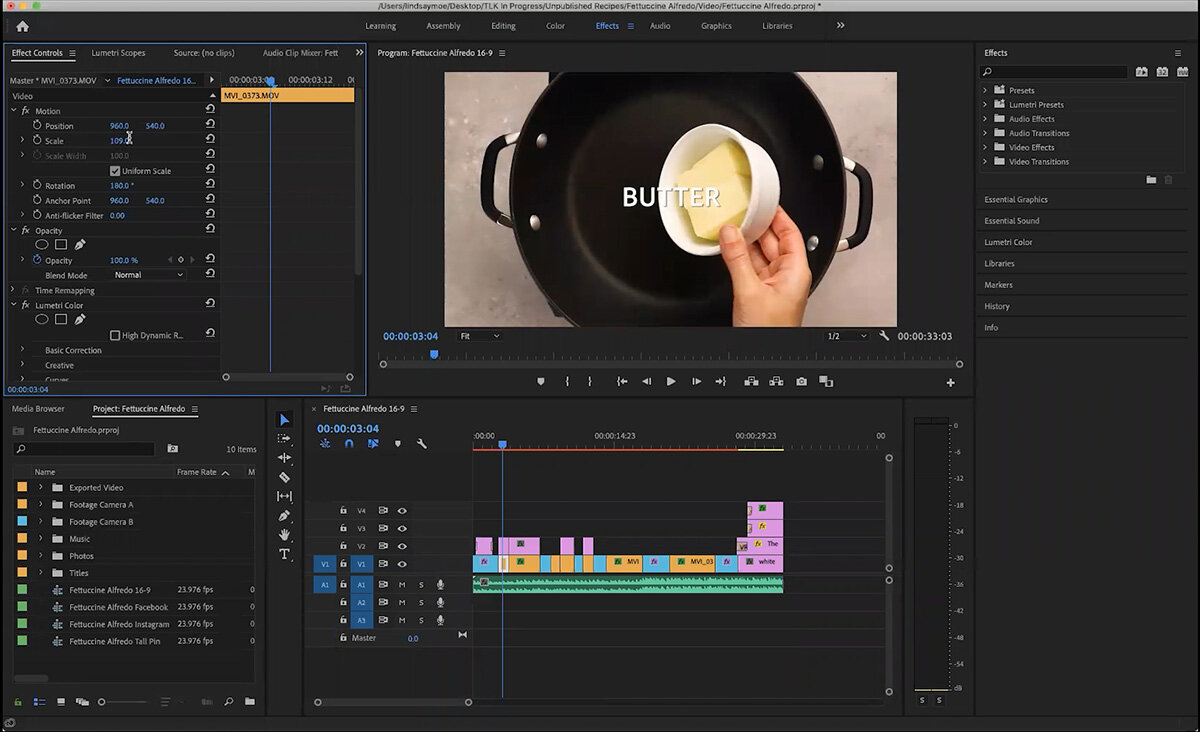
Scale is one of the most basic motion effects.
I have stands set up on either side of this shooting set up. Let’s imagine I accidentally set up the camera so that the bottom of one of those stands was visible in the frame.
To get that out of the frame I could click on the clip and go into the effects panel. If I increase the scale of the clip, it will zoom in and crop out whatever might accidentally have crept into the edge of the video.
You can change the scale number by either clicking on it and typing a number in, or clicking and dragging the number to the right or left to increase or decrease it.
Rotation

If you’re shooting with your camera across from you, your footage is probably showing the hands coming from the top of the frame. I like to have the hands coming from the bottom so the viewer feels like they’re cooking with you.
To fix this, click on the clip and go into the effects panel. Change the rotation of the clip to 180º.
Position
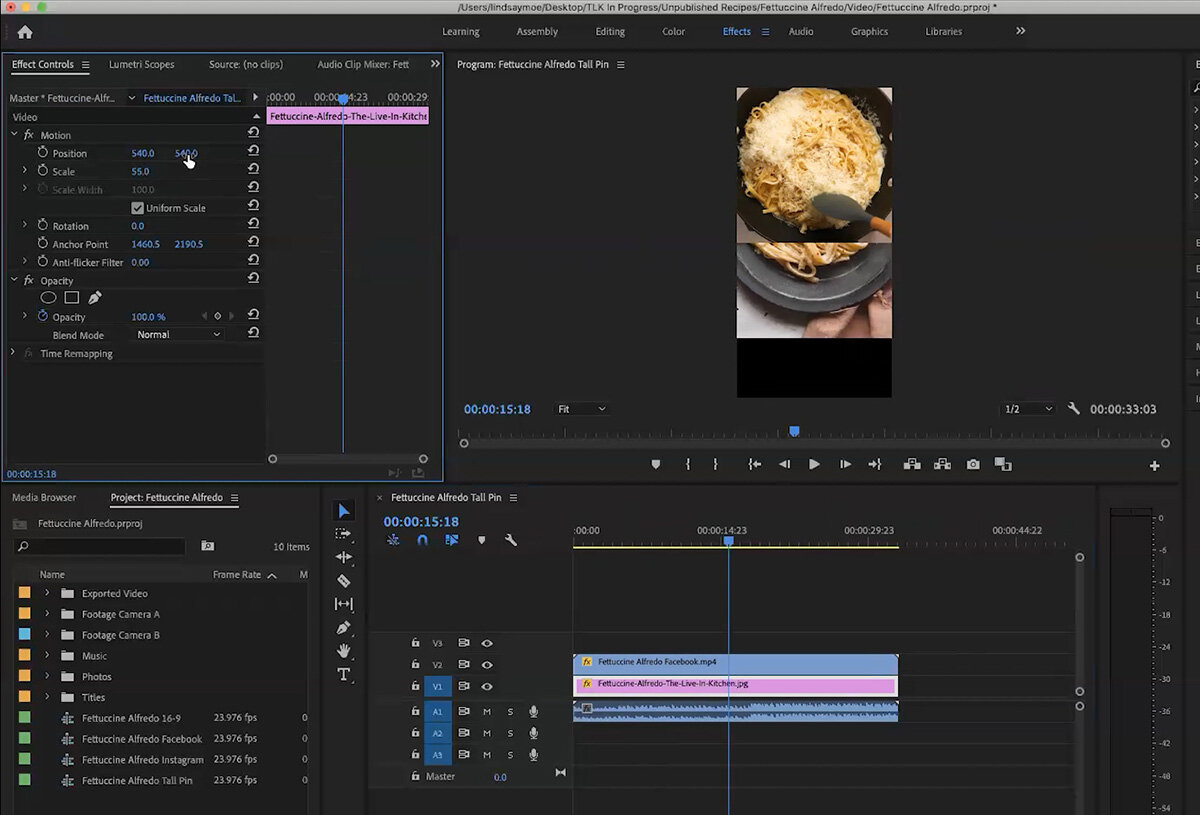
Position has two numbers to represent the X and Y axis. Using these two numbers you can adjust the position of any clip.
For example, if I am creating a tall video pin I can move the video to 540 x 540 so it sits on top, then adjust the scale and position of the photo so it looks good on the bottom.
This is also useful if you’re creating a square video.
I edit all my videos in 16:9 format, then copy and paste that sequence into a square template.
Sometimes, the video doesn’t align perfectly in the center and cuts off some important information or just looks a bit strange within the square. You can change the position to better center your video within the square to create a polished video. This is especially evident if you have something round like a bowl or food processor that has gotten off center.
Keyframes

Motion effects can help you create a more dynamic recipe video, especially if you’re using keyframes.
Keyframes tell the video when to make changes to the motion effects you’ve put in place.

If you wanted to create a slow zoom on a clip to draw the viewer in, you would click on the clip you want to adjust, place the playhead within the clip, then press the UP ARROW to move to the beginning of the clip.
In the effects panel under effects controls, click on the “Toggle Animation” stopwatch next to scale to enable animation between keyframes and create a keyframe at the beginning of the clip.
Wherever we set the scale at this keyframe is where the clip will start. We’re going to leave it at 100.

Back in the timeline, press the DOWN ARROW and the LEFT ARROW to move to the last frame of the clip.
Now increase the scale to 110, which will create another keyframe, and tell the clip to slowly zoom from 100 to 110 over the course of the clip.
You might want to do this on your hero shot or if you’re holding any clip for a longer period of time to create more visual interest.
You can also add as many keyframes as you’d like inside a clip. This is great if you want to animate your titles.

For example we can have the title slowly scrolling down the frame and then bounce back up by adding a few keyframes and telling it where to go.
To add more keyframes, click the tiny circle between the two arrows that are to the right of the position numbers. To delete keyframes, simply click on them and press delete.
Keyframes are also especially useful if you’re creating slideshow style videos from photos rather than video. You can use animated position and scale to make the slideshows much more engaging that static photos.
This is a very basic intro to using keyframes and motion effects. You can do a lot more with smoothing out the animation, but I just want you to be aware of what’s possible.
Motion effects have so many uses in recipe videos, I really hope you’ll try this out.
Let me know if you have any questions, or head over to the Facebook Group to start a conversation there!