How to Create Video Pins in Premiere Pro
Learn how to create video pins quickly and easily in Adobe Premiere Pro so you can increase your impressions, viewers, and traffic when it comes to Pinterest. Watch the video, or keep reading to learn how.

Video pins have been performing super well for me on my own food blog. I definitely think it’s something you should be experimenting with.
There are a ton of ways you can make video pins, I recommend finding your own style for them. This is what I’ve been using and it has been working really well for me.
I am always experimenting with new styles to see if something else works better, but these are really easy to make and will only add a few minutes to your editing workflow if you’re already editing recipe videos.
I have created a template project just for creating tall videos pins and this is because I’ve been going back and creating video pins for each of my many videos.
For new videos I’m editing, I just include a sequence within my regular template project for creating video pins. If you haven’t watched my video on creating template projects I highly recommend you go back and check that out, it’s a huge time saver!
What I’m going to do is click once on my sequence template and go to Edit —> Duplicate to make a copy of it. I’m naming this one Mushroom Walnut Tacos Tall Video Pin.
I already have footage imported into my footage bin (you can also go back and watch my video on how to use bins). For these, I use my square recipe video that I’ve already exported, and just drag it over into the timeline.

I keep the existing settings because I already have the template set up, but if you wanted to get your own set up like this I have it set to 1080 x 2160.
You can make your video pins whatever size you feel comfortable with, whether that’s 2:3 or whatever, this is just what I have found to work for me.
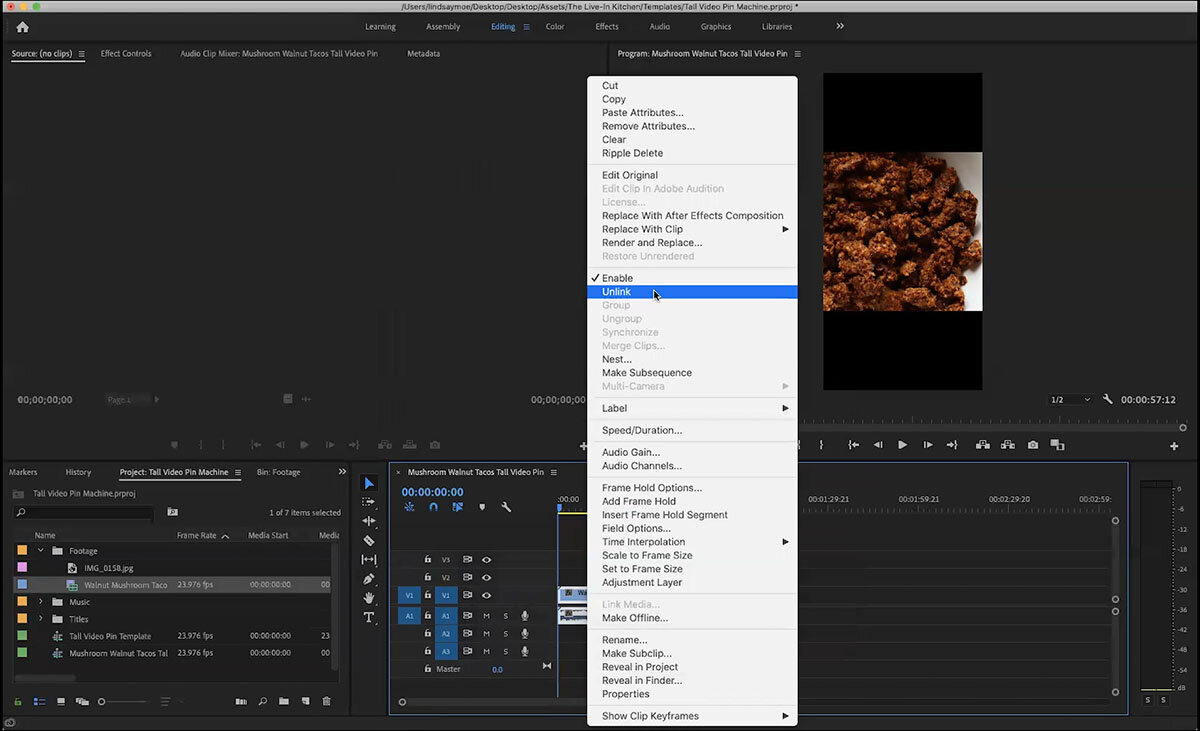
Once I have the square video in the timeline, I’m going to CONTROL + CLICK and Unlink the video from the audio. I like to then move the video to V2 (the second video track) so it will cover any overlap with the photo I’m going to add.

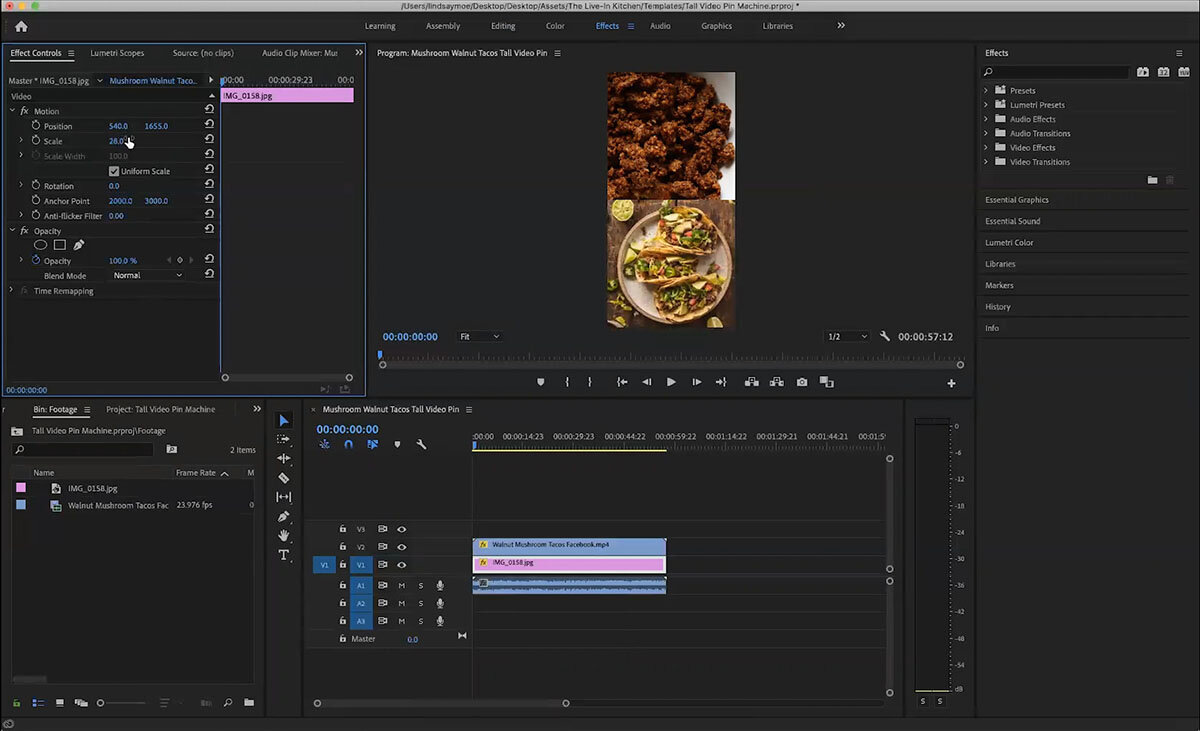
From there, head to the effects panel, make sure your video is selected in the timeline, and adjust the video to the top. I do this by changing the position to 540 x 540.
I have also imported an image that I’m going to drag over into V1 and extend it to the length of the video.

You can see the image is bigger than the space allowed. We’re going to go into the Effects panel, make sure you have the image clip selected in the timeline, and then adjust the scale and position until it looks how you want.
You can now go back to your timeline and watch it to make sure the whole thing looks how you want.
These pins are a little strange because when you view them on Pinterest as a search result, it only shows the bottom half of the video and the top half of the photo, but they do really well and seem to have better engagement for me than just a square video.
If you prefer you can keep the video in the middle and include photos or text on the top and bottom so it shows just the video in the search result. I’m always experimenting with new styles and with Pinterest’s love of new pins, I definitely recommend you do as well.
I hope you’ll give these a try! Let me know if you have any questions, or be sure to join our Facebook Group if you’d like to start a conversation over there.